school performances
Yet, this scenario is another reason to learn how to use your camera without a flash because when you are 10 rows back though your flash may pop up and light up, it does nothing for your picture. And because your little pop up flash cannot reach them, your picture will most likely turn out darker than you’re hoping for. If…it’s on auto. :)
So, here’s a project for you. Let’s move it on up. The next step….
Turn your camera dial to the [Av] setting. This setting is aperture priority. You now have control over the aperture. Remember aperture? It’s the opening in your camera lens. It lets light in but it also determines the depth of field (or if things are sharp or blurry in the background). So you will be changing the aperture but the camera will automatically change the shutter speed.
So…go outside during the day in some consistent shady light (like under a patio cover or under a big tree or in the shade of your house)
(1) Set your camera dial (usually on top left of camera) to [Av]
(2) Set your ISO (push the ISO button usually on the top right of camera) and turn the dial right next to it to 400 (I often use this for nice shade)
(3) Push the ISO button once more to set it.
(4) Now before you take a picture turn that dial (usually on top right of camera) to adjust the aperture. Try 2.8 first. Shoot a picture. Then change it to 5.0. Shoot another pic. Then change it to 10, (shoot) then 16 (and shoot).
(5) Now compare the shots. Probably easier to see the difference on your computer.
If your camera will not let you change the aperture (a.k.a. “f stop”) to 2.8 it’s because your lens won’t open up that wide. Try the smallest number it will allow you to go to (for many lenses that come with the camera it’s 4).
Now take some pictures of one still object or person and see what the different aperture settings do to the image. The smaller the number (like 2.8 or 4) will create a blurry/fuzzy background. The bigger the number (10, 16, etc) will allow all of the things in the background to be in focus. Try it. See what you like and what you prefer. I love to use f stops (aperture settings) between 2.8 and 4 when photographing a child. The background will fall away and the focus will be on the child.
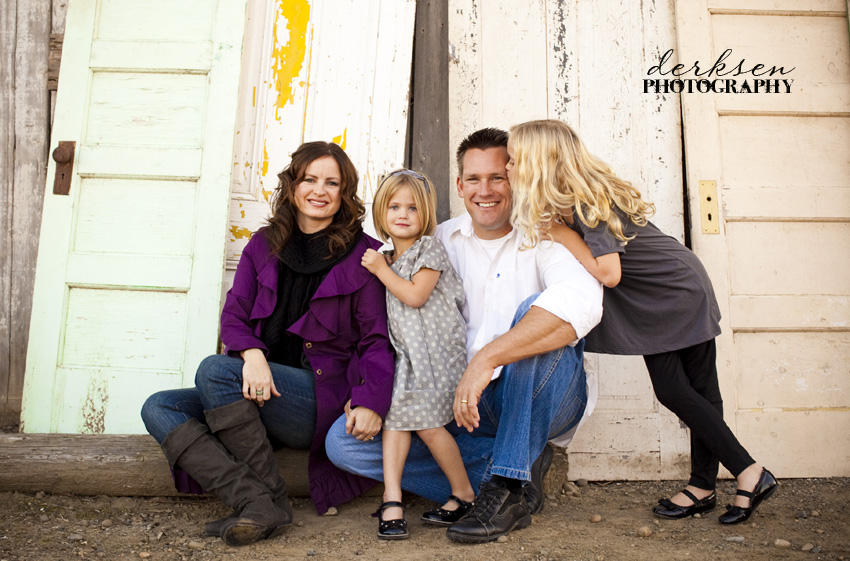
This picture below is at aperture (f stop) 5. See how you can see the doors in the background? They’re not blurry?
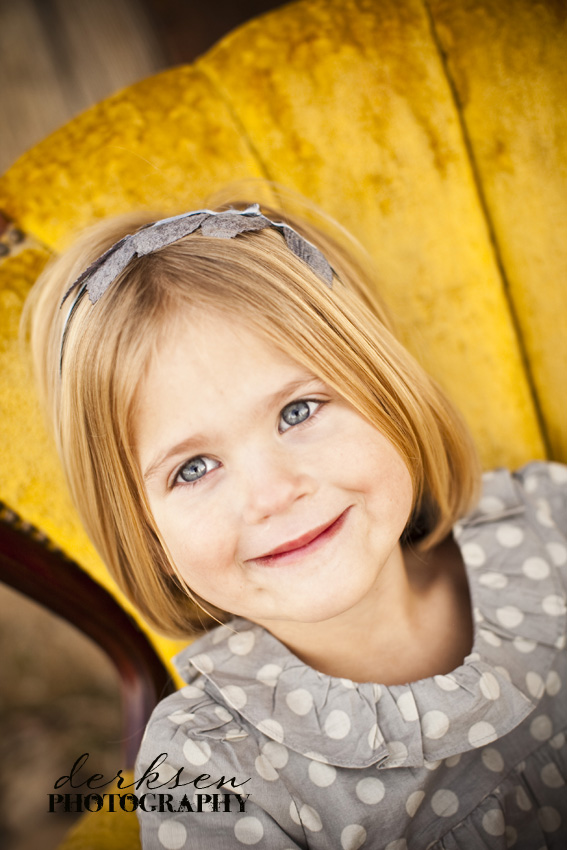
And this picture below is at an aperture (f stop) of 2.8. See how the yellow chair kind of falls away? It’s a little out of focus?
How low does your lens allow you to set the aperture? 4? 2.8?
Let me know what works and what doesn’t? What do you think? Leave a comment.
Good luck! :)


